Problem:
How to enable Windows 10 to work as a wireless access point. Use the Netsh WLAN commands to create Ad Hoc networks. Internet Connection Sharing (ICS) includes a default route and DHCP service for fully pledged access point (AP) routing!

Netsh WLAN is not ground-breaking innovation -but it sure comes in handy! What's more, the default wireless security settings use WPA2 with AES encryption and CCMP ciphers. WPA2 provides the best wireless security standard and data rates. Compare that to your old Linksys AP.
This solution can also be used for basic penetration testing. Think MITM hotspot for Intercepter-NG ;)
Solution:
Install additional wireless NIC (e.g., USB). Create an Ad-Hoc wireless network SSID. Start broadcasting:
Create wireless SSID:
C:\Users\billgates>netsh wlan set hostednetwork mode=allow ssid=Personal-WiFi key=H@rd2Cr@ckKey!!%42- Start the wireless SSID:
C:\Users\billgates>netsh wlan start hostednetwork
Other Wi-Fi enabled computers may connect to the Ad-Hoc wireless network. This feature is great for simple file sharing but it falls short of shared Internet access. Use the ICS to turn this Ad-Hoc network into an Internet AP:
- Right-click on the network icon located in the taskbar. Left-click on Open Network and Sharing Center.

- Click on the Wi-Fi connection located next to Connections:

- Click on the Properties button. Click on the Sharing tab. Enable ICS Sharing.
- Assign the ICS to an available NIC from the pull down menu. N.B., The pull down list is only visible when the computer has more three or more NICs (either Wi-Fi or Ethernet).
That's It!
Additional Netsh WLAN Commands:
Show Wi-Fi Networks:
C:\Users\billgates>netsh wlan show hostednetwork
Hosted network settings

-----------------------

    Mode                   : Allowed

    SSID name              : "Personal-Wi-Fi"

    Max number of clients  : 100

    Authentication         : WPA2-Personal

    Cipher                 : CCMP


Hosted network status

---------------------

    Status                 : Started
Stop Wi-Fi AP:
C:\Users\billgates>netsh wlan stop hostednetwork
Change password:
netsh wlan refresh hostednetwork [SSID_Password]
Show wireless profiles:
netsh wlan show profiles
Retrieve profile key:
netsh wlan show profiles name=[profile name] key=clear
Delete wireless profiles:
netsh wlan delete profile name=[profile name]
Set wireless network priority:
netsh wlan set profileorder name=[profile name]interface=[interface_name] priority=1
Stop automaticac connection:
netsh wlan set profileparameter name=[profile name] connectionmode=manual
Export a wireless profile:
netsh wlan export profile name=[profile name]
Import network profile:
netsh wlan add profile filename=[path_and_filename.xml] interface=[interface_name]
Problem:
How to determine whether a user is logged onto a workstation remotely. For example, the help desk wants to remote desktop to workstation for maintenance purposes. This task requires that no other user is logged onto the workstation. Help desk does not want to disrupt any staff that may be working on the computer.
Solution:
Use Query Windows Station (qwinsta) to list active sessions:
qwinsta /server:hostname_or_IP
Hint:
Combine this with the reset session command as needed:
reset session {SessionName | SessionID} [/server:] [/v]
That's It!
Problem:
WSUS GUI times out while running back-end SQL queries. WSUS typically times out when refreshing Updates: All Updates, Critical Updates, Security Updates, etc.
Symptoms:
WSUS runs slow. WSUS IIS App pool crashes and stops. WSUS problem requires administrator to reset server node in order to function again. Clients cannot download WSUS updates when APP pool is down.
Reason:
Large number of updates in the catalog grows over time. The update catalog reaches a size that increases the load on WSUS. The server runs out of available memory for the App pool.
Background:
Kent Agerlund does a good job describing the problem on his blog. Agerlund also provides a solution using a SQL script. However, Agerlund's fix does not work for all WSUS implementations. The script only works with the full version of SQL -not the Windows Internal Database. For example:
The specified option 'Ad Hoc Distributed Queries' is not supported by this edition of SQL Server
Solution:
Talented programmer,
SAK, updates the script to work with WSUS 2012 running a Windows Internal Database version of SQL:
- SQL script to identify obsolete updates on WSUS server:
USE [SUSDB]

GO

DECLARE @return_value int

EXEC @return_value = [dbo].[spGetObsoleteUpdatesToCleanup]

GO
- SQL script to delete all obsolete updates on WSUS. N.B., the script provides feedback messages, after each update ID is deleted.
DECLARE @minimumDeadDeploymentTime DATETIME
DECLARE @revisionDeletionTimeThreshold INT
SELECT @revisionDeletionTimeThreshold=RevisionDeletionTimeThreshold FROM dbo.tbConfigurationC
IF @@ERROR <> 0
BEGIN
    RAISERROR('spGetObsoleteUpdatesToCleanup: failed to get RevisionDeletionTimeThreshold from dbo.tbConfigurationC', 16, -1)
END
SET @minimumDeadDeploymentTime = DATEADD(day, 0 - @revisionDeletionTimeThreshold, getutcdate())


declare @updateid int
declare @msg varchar(255)
declare cur CURSOR LOCAL for
SELECT DISTINCT u.LocalUpdateID FROM  dbo.tbUpdate u
    INNER JOIN dbo.tbRevision r ON r.LocalUpdateID = u.LocalUpdateID
    INNER JOIN dbo.tbProperty p ON p.RevisionID = r.RevisionID
WHERE
     p.PublicationState = 1
     AND (p.ExplicitlyDeployable = 1 OR p.UpdateType IN ('Category', 'Detectoid'))
     AND p.ReceivedFromCreatorService <= @minimumDeadDeploymentTime
     AND NOT EXISTS (SELECT * FROM dbo.tbBundleDependency bd
                     INNER JOIN dbo.tbRevision r1 ON bd.BundledRevisionID = r1.RevisionID
                     WHERE r1.LocalUpdateID = u.LocalUpdateID)
     AND NOT EXISTS (SELECT * FROM dbo.tbPrerequisiteDependency pd
                     INNER JOIN dbo.tbRevision r2 ON pd.PrerequisiteRevisionID = r2.RevisionID
                     WHERE r2.LocalUpdateID = u.LocalUpdateID)
     AND NOT EXISTS (SELECT * FROM dbo.tbDeployment d
                     INNER JOIN dbo.tbRevision r3 ON d.RevisionID = r3.RevisionID
                     WHERE r3.LocalUpdateID = u.LocalUpdateID
                         AND d.TargetGroupTypeID = 0
                         AND d.ActionID IN (0, 1, 3))
     AND NOT EXISTS (SELECT * FROM dbo.tbDeadDeployment dd
                     INNER JOIN dbo.tbRevision r4 ON dd.RevisionID = r4.RevisionID
                     WHERE r4.LocalUpdateID = u.LocalUpdateID
                         AND dd.TargetGroupTypeID = 0
                         AND dd.ActionID IN (0, 1, 3)
                         AND dd.TimeOfDeath > @minimumDeadDeploymentTime)
ORDER BY u.LocalUpdateID DESC


open cur

fetch next from cur into @updateid

while @@FETCH_STATUS = 0 BEGIN

    --execute your sproc on each row
    --exec uspYourSproc @field1, @field2
 set @msg = 'Processing update: ' + cast(@updateid as varchar)
 RAISERROR( @msg,0,1) WITH NOWAIT

 exec spDeleteUpdate @updateid


    fetch next from cur into @updateid
END

close cur
deallocate cur
Problem: Windows Updates continually fails to install. Setup program provides error and quits.
Errors:
- Office 2013 Setup Error
- Bootstrapper has stopped working
Solution:
- Attach Office ISO or insert Office DVD.
- Browse to the following directory: D:\standard.ww
- Run the following program: standard.msi
That's it!
Problem: Outlook 2016 cannot preview Excel file attachments. Additional symptoms include unable to copy or save Excel attachments.
Error: This file cannot be previewed because there is no previewer installed for it.
Reason: Microsoft plans to correct issue in future program updates.
Solution: Change registry setting to correct this problem:
Registry Change:
HKEY_LOCAL_MACHINE\SOFTWARE\Microsoft\Office\ClickToRun\REGISTRY\MACHINE\Software\Microsoft\Windows\CurrentVersion\PreviewHandlers
String: {21E17C2F-AD3A-4b89-841F-09CFE02D16B7}
Value: Microsoft Visio previewer
String: {65235197-874B-4A07-BDC5-E65EA825B718}
Value: Microsoft PowerPoint previewer
String: {84F66100-FF7C-4fb4-B0C0-02CD7FB668FE}
Value: Microsoft Word previewer
String: {00020827-0000-0000-C000-000000000046}
Value: Microsoft Excel Previewer
<\code>
Additional Note:
This seems to be a problem with all the Outlook 2016 installs. Consider creating a group policy to push this change to all computers with the software installed.
That's it!
Summary:
How to configure Bit-Locker and enable PIN for pre-authentication prompt.
Problem:
Bit-locker encryption protects data-at-rest (i.e., offline data). It protects data with an encryption key that is stored in the TPM. This private key cannot be exported so its encrypted data should be secure from physical theft. Why then, do we need a pin?
Recall, BitLocker only protects data-at-rest. The hard dive is only encrypted
before the operating system starts -not after. This caveat makes data vulnerable to authentication bypass attacks.
The BitLocker PIN is an
optional security feature. The computer will not load Windows without PIN authentication. You data remains secure.
Solution:
Enable and enforce the Bit-Locker startup PIN.
Instructions:
Start by enabling BitLocker from Control Panel. If this step is skipped you may receive the following error:
"The group policy settings for bitlocker are in conflict and cannot be applied."
Next, open the Group Policy Management or Local Group Policy Editor:
BitLocker Drive Policy:
Computer Config;
Administrative Templates;
BitLocker Drive Encryption;
Drive encryption and cipher strength:
-Enabled:
--OS: XTS-AES 256-bit
--Fixed: XTS-AES 256-bit
--USB: AES-CBC 256-bit
Disable new DMA devices when computer is locked:
Prevent memory overwrite on restart
-Enabled: Protect your device from cold boot attacks.
Wipe those BitLocker secrets from memory during a restart.
BitLocker OS Settings:
Computer Config;
Administrative Templates;
BitLocker Drive Encryption;
Operating System Drives:
Allow enhanced PINs for startup:
--Enabled
Require additional authentication at startup:
--Configure TPM startup: Allow TPM
--Configure TPM startup PIN: Require Allow PIN with TPM
--Configure TPM startup key: Allow startup key with TPM
--Configure TPM startup key and PIN: Allow startup key and PIN with TPM
Note, the enhanced PINs provide support for alphabetical and special character use. This can make the PIN strength stronger and easier to remember.
Also note, additional authentication requirements are all set to allow, rather than require. This helps avoid BitLocker errors, on new devices, after this group policy has been applied. Keep in mind, the UAC protects BitLocker from undesired changes. Therefore, avoid Administrator interactive logons.
Configure Client:
Run the following command with Administrative privileges:
manage-bde -protectors -add c: -TPMAndPIN
Note: Windows 10 version 1903 no longer requires command line configuration. Instead, Windows provides an option to enable BitLocker PIN from the initialization wizard -cool beans!
That's it!
References:
http://ctogonewild.com/2009/08/28/10-things-you-dont-want-to-know-about-bitlocker/
http://www.pcworld.com/article/3005182/encryption/bitlocker-encryption-can-be-defeated-with-trivial-windows-authentication-bypass.html
https://technet.microsoft.com/en-us/library/jj649837(v=wps.630).aspx
https://technet.microsoft.com/en-us/library/cc766295(v=ws.10).aspx#BKMK_S5
 |
| Fix problem with saving files in Office 2016. |
Problem: Error saving Office 2016 files, "Word could not create the work file".
Error Source: AppData registry data (i.e., Cache) is set for default user (i.e., the user account used during the Office installation).
For Example, registry cache setting may read:
C:\users\billgates\AppData\Local\Microsoft\Windows\INetCache
Correct format:
%USERPROFILE%\AppData\Local\Microsoft\Windows\INetCache
The error may, or may not result from SYSPREP.
Fix: Registry change fixes this error:
- HIVE: HKEY_CURRENT_USER
- KEY PATH: SOFTWARE\Microsoft\Windows\CurrentVersion\Explorer\User Shell Folders
- VALUE NAME: Cache
- VALUE TYPE: REG_EXPAND_SZ
- VALUE DATA: %USERPROFILE%\AppData\Local\Microsoft\Windows\INetCache
Push change out via Group Policy if updates are needed for multiple PCs:
- Computer Configuration
- Windows Settigns
- Registry: New Item
- Hive: HKEY_CURRENT_USER (HKU\.DEFAULT)
- Key Path: SOFTWARE\Microsoft\Windows\CurrentVersion\Explorer\User Shell Folders
- Value Name: Cache
- Value type: REG_EXPAND_SZ
- Value data: %USERPROFILE%\AppData\Local\Microsoft\Windows\INetCache
Note: User Shell Folders\Cookies is also set for default user. Unsure of impact so I recommend changing this to %USERPROFILE% as well.
This fix resolved errors for Office 2016 on Windows 8 and Windows 10. This pertains to retail, volume license, and Office 365 versions of Office 2016.
This fix is similar, but different from Microsoft KB 2285187. KB 2285187 is only for Office 2013, 2010, and 2007. It may or may not be pertinent to Windows 8 and Windows 10. The registry value is different.
 Error: "The trust relationship between this workstation and the primary domain failed".
Background: Domain logon fails because the computer password is outdated. The machine password updates every 30 days. This problem occurs when adding a computer to the domain with the same name, or restoring a computer from backup (e.g., VM snapshot).
Solution: First and foremost, ensure computers have a local Administrator account and password before this problem occurs!
- Create a unique (i.e., new) administrator account and password for each computer.
- Document the information.
- Disable the default local "administrator" account.
Use the local administrator account to log onto the computer after the domain authentication fails. One of the following steps will fix this issue:
Netdom:
netdom.exe resetpwd /s: /ud: /pd:*

 = a domain controller in the joined domain

 = DOMAIN\User format with rights to change the computer password
Netdom is not available with every version of Windows.
- Standard with Windows 2008 R2.
- Standard with Vista.
- Install Netdom on Windows 7 with the Remote Server Administration Tools (RSTAT).
- Powershell replaces netdom,exe in Windows 2012 and Windows 8
PowerShell:
Reset-ComputerMachinePassword [-Credential ] [-Server ]
Note: "-Server" represents the local domain controller.
GUI:
Alternately, Microsoft recommends removing the computer from the domain:
Control Panel > System > Computer Name > Change settings > Add computer to a workgroup > Restart > Repeat process and add computer to the domain.
References:
https://support.microsoft.com/en-us/kb/2771040
https://support.microsoft.com/en-us/kb/325850
https://technet.microsoft.com/en-us/library/hh849751.aspx

This article explains how to fix installation errors for Windows Update installations.
Problem: Windows Updates fails to install on Windows 2008 R2 System Center Data Protection Manager (DPM) server.
Errors: Specific errors may include, "Installation Failure: Windows failed to install the following update with error 0x80070643".
Solution: Delete the Windows Update cache and remove all superseded service pack backup components to resolve the issue. N.B., This situation is not specific to DPM; and can help with other Windows environments, including Windows 8.1 & Windows 2012 R2.
- Stop the Windows Automatic Update Service from the command line:
net stop wuauserv
- Go to the Windows directory from the command line:
cd\windows
- Purge the update cache from the command line:
rd /s SoftwareDistribution
- Start the Windows Automitic Update Service from the command line:
net stop wuauserv
- Remove superseded cumulative Service Pack backup components:
Dism.exe /online /Cleanup-Image /SPSuperseded
That's it.
References:
http://technet.microsoft.com/en-us/library/dn251565.aspx
http://support.microsoft.com/Default.aspx?kbid=971058
By Steven Jordan on 10/13/2013.
Problem:
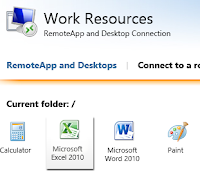
Users experienced slow authentication with Terminal Services Web Access applications or remote desktop. Authentication to the RDWeb Work Resources RemoteAPP and Desktops functioned properly. Slow authentication occurred after an application launched. Authentication time was between 30 seconds to 120 seconds (or longer).

Warning message, "The identity of the remote computer cannot be verified. Do you want to connect anyway?" Problem occurred under similar circumstances for both Windows 2008R2 Remote Desktop Server and Windows 2012 Remote Desktop Services server.
Issue:
The problem for the 2008R2 server resulted from a
hostname and SSL certificate name mismatch. Terminal server settings matched the hostname. Terminal gateway settings matched the name on the SSL certificate (though different from computer's host name).
The problem for the 2012 server resulted from a
disjoint domain suffix. The company used a legacy domain suffix of "example.local". The Active Directory domain suffix was different from the public domain name of "example.com". In this situation the hostname was correct but the suffix mismatch caused longer than expected authentication.
Resolution:
Identifying the problem was the difficult part. There are a number of strategies to work around this requirement:
- Use the same internal Active Directory domain as the public external domain (thus no SSL issues).
- Windows PKI Certificate Server can be used but it is not necessary. Use a self generated SSL certificate to match the domain joined hostname and suffix. This may not be the best fit for all organizations because it results with a warning to end users that indicates the certificate is from an untrusted source.
If the RDP service is intended for managed resources (domain laptops) the self-generated certificate can be distributed to domain computers' trusted root through group policy.
Staff that connect with personal computers they may choose to discard the warning and import the certificate to prevent further warnings. This may be a headache for anyone that has to support more than a few end-users.
- Change the RDP server's domain suffix. Make the change under Control Panel > System > Computer Name > Advanced > domain suffix. I should disclose I have not attempted this option so I cannot confirm it will work. I have read (see references) instances where it has worked for others.
- Choose not to use the Remote Terminal Gateway and stick with with a natted VIP on port 3389. This is not recommended best practice but at least the connection is encrypted. If this method is used do not choose "low security" because in certain circumstances the data may not be encrypted both directions. Always choose the "medium" or "high" security levels.
This solution only allows a Windows RPD client to connect. Advanced features like Web Applications and load balanced terminal server farms will not be available.
- The best option is to install Terminal Gateway server on a stand-alone (non-domain) server. The stand-alone server should sit in the DMZ and only connects to domain resources individually exposed to the perimeter.
This solution maintains best security practices. The solution also allows for a naming convention that is independent of the Terminal Server's host name and domain suffix!

* My personal experience with slow RDP authentications was always related to discrepancies between server names and SSL certificates. Good luck!
References:
Problem: Failing node. Failover Cluster Manager gave the following message:
The cluster network name is not online.
There was also the following system log error:
Solution: When attempting to bring nodes online to the failover cluster be sure to check the network cluster client role. The role must be set to "allow clients to connect through this network"
*Note: Please try the Powershell or GUI method before attempting this registry fix.
Registry fix resolved the issue:
Location: HKEY Local Machine\Cluster\Networks\NIC GUID\Role
Roles:
1. Do not allow cluster network communications on this network
2. Allow cluster network communications on this network
3. Allow clients to connect through this network
The role must be set to "3" to allow the node to participate with cluster. Once the role is properly set the node will become online and work with the cluster.
This is widely reported issue with the Microsoft Failover Cluster services and Microsoft Exchange Server 2010 Database Availability Group (DAG) node.
P.S. This post has been surprisingly popular. Please leave comments if this helps. Thanks! -SMJ
Full Technet URL for this issue can be found at: http://blogs.technet.com/b/timmcmic/archive/2010/05/12/cluster-core-resources-fail-to-come-online-on-some-exchange-2010-database-availability-group-dag-nodes.aspx
Last updated August 29th, 2012 by Steven Jordan
 Netsh WLAN is not ground-breaking innovation -but it sure comes in handy! What's more, the default wireless security settings use WPA2 with AES encryption and CCMP ciphers. WPA2 provides the best wireless security standard and data rates. Compare that to your old Linksys AP.


